While testing an iPhone application that is part of a bigger solution developed by teams in different locations, I came across a few issues that made me look into some of the available options for recording the application in use on a real iPhone.
However, when I googled for “mobile testing sled for webcam recording”, I found a lot of either too complicated or too expensive solutions. Most of these solutions are meant to be used during usability testing, which is why they didn’t suit my needs. I had different issues that I wanted to solve:
1. Live demos: My project is developed by 2 different scrum teams and our demos at the end of each sprint are done online, over live meeting. Demoing the iPhone application live seemed to always be a problem – even when we used some mirroring solutions available for iPhone (where the iPhone screen is mirrored on a Mac OS screen), these didn’t show the user’s tapping, scrolling, etc. Webcam recording would also capture finger gestures and show the real user interaction.
2. Bugs – Sometimes, when I report bugs, it’s hard to explain how “I quickly swipe between this and this screen and suddenly I can see this other screen that is actually overlapped with parts of this other screen that I used in the first place…” A video recording of my actions would be so much more useful.
3. Remote Access to the iPhone screen for Test Automation – We have a set of automated tests for our iPhone application that are run on a Mac in location A, while some of our team members are in location B. Having the webcam always on would help them have access to the iPhone while developing automated tests and eventually, we might use the webcam to record the automated actions and analyze them later on if needed.
So I decided to try to build my own testing sled using parts I already had around the office. It turned out that the original iPhone packaging had everything I needed.
Out of the 3 lower parts of the iPhone original packaging box:
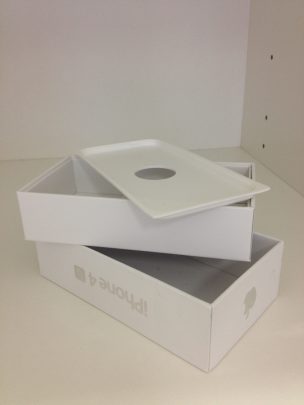
I kept the top two:
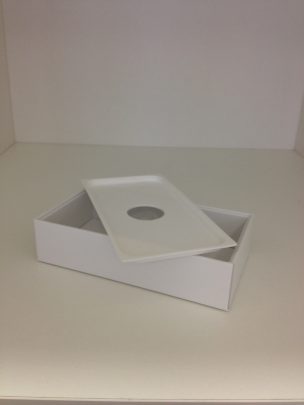
and simply placed the thin plastic holder inside the the other container, as shown below. The plastic holder is actually a bit wider than the container, so once you put it inside it is firmly in place:
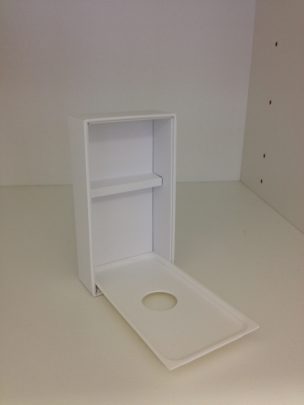
We already had a webcam: http://www.amazon.com/HP-Webcam-HD-3110-Widescreen-TrueVision/dp/B003ZYDQW2 so this was the one I used. I didn’t try very hard to make this ‘pretty’, since I was really going for something we could use right away – so you might want to improve my design here 😉 I simply used a lot of tape to keep the webcam in place on the top side of the ‘sled’:
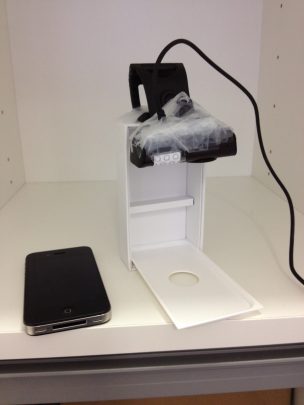
The plastic holder is ideal for holding the device since, of course, it was built to fit the iPhone perfectly. Its sharp corners might be a bit uncomfortable if you hold the whole sled in your hand, so you might want to round them.
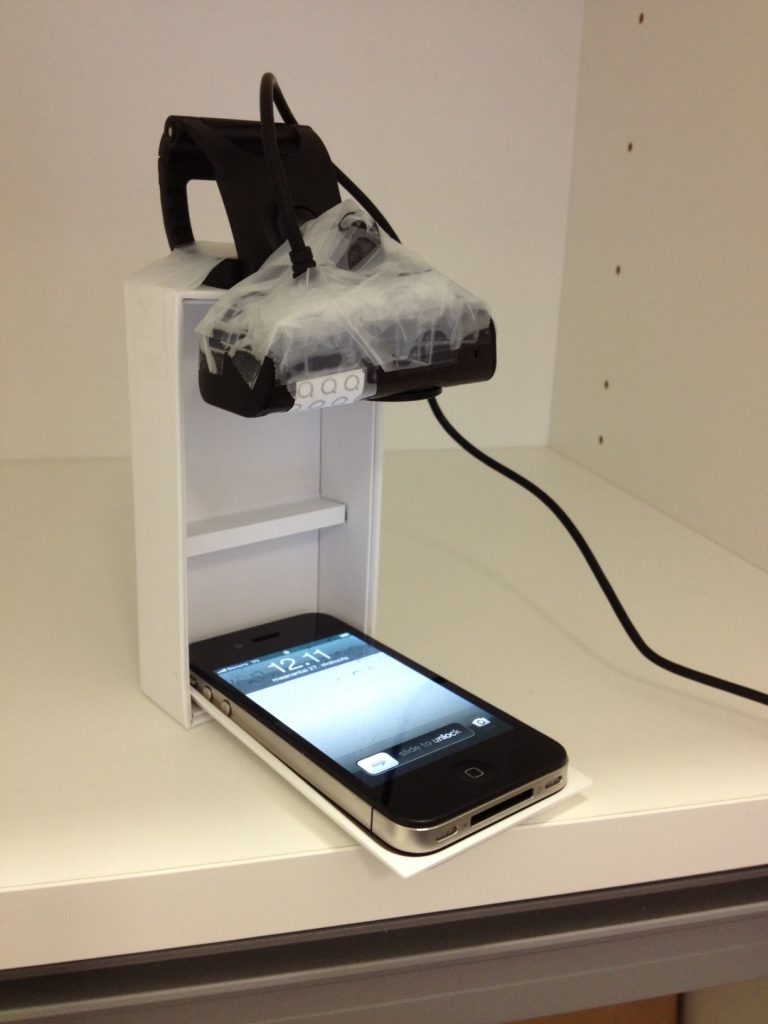
Because of its size and weight, this webcam is not ideal – so if you get a chance to choose, you should go for a smaller model. However, even with this webcam, I am able to hold the sled in my hand and actually use it easily, so we are now able to broadcast our iPhone demos to our teams in other locations and also show finger movements, scrolling and taps:
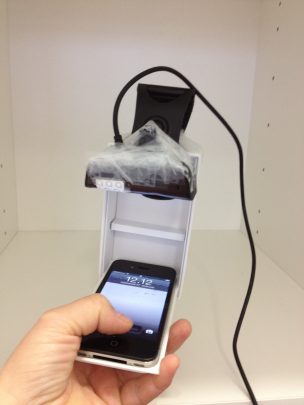
This sled is most likely too rough to be used for usability testing, where you really want the users to use the phone in a manner that is as close as possible to the real experience, where they would simply be holding the phone in their hand.
For my team’s purpose though, this is just fine – and it was free and ready right away!
If you have any improvement suggestions, I’d be happy to hear about them.
-Ru
looks like something i’d build. Though i’d probably use more adhesive tape. Congratulations.